Monday 30 March 2020

WEEK 6: 2.5D Shapes and Assemblies

Measurements & Diagrams of 3 modules 

Bedroom, Kitchen, Hallway 


To accurately depict the transitional space (hallway) that interconnects the three modules, separate measurements were taken of the areas, placing emphasis on the doors and openings that would serve as a connection to each space. By creating a flat plan, it is easy to compare the dimensions of each space and ensure that the Fusion360 model remains accurate to the data. 
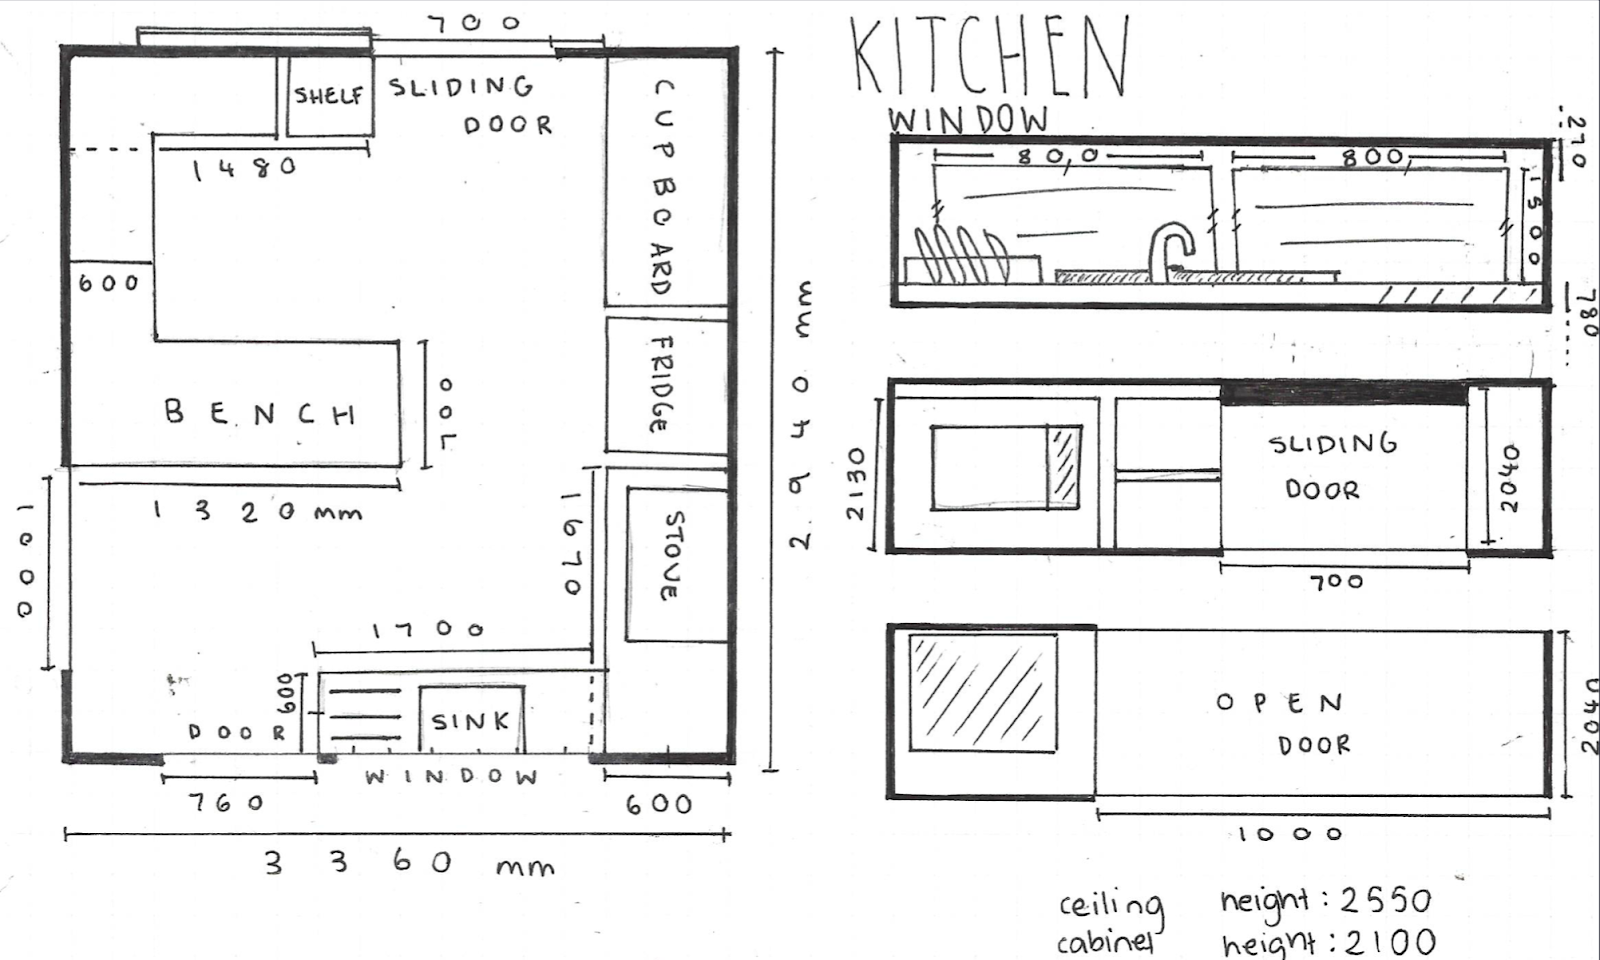
The hallway was chosen as the transitional space due to its location in the centre of the house, and thus its connection to all modules in the area. This connection is liberal in moving and transitioning between different rooms and is a necessary aspect to the functionality of the house. 
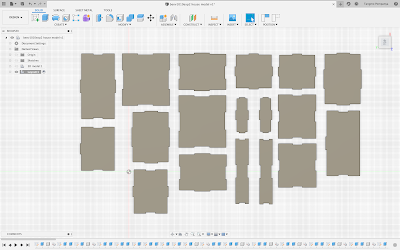
FUSION 360 MODELS 

Module 1: Bedroom 

Whilst getting the scale of the room accurate was not difficult, creating the tabs for each wall was difficult as at times it would not connect to the face or attach itself to another component completely. This issue was overcome with more practice on other faces and isolating different layers and components. This skill was carried on to other modules. 


Module 2: Transitional Hallway 

The face attached to the side of the bedroom caused difficulties as it kept morphing into one face. This was fixed by isolating the layers and components completely. 

Module 3: Kitchen 

FINAL MODEL 


Experiences 

  • Leant how to use Fusion 360, specifically creating faces, components, attaching external faces and isolating layers 
  • Faced difficulty with separating components which was overcome by trial and error and understanding the functionality of F360
  • Learnt how to work and shift the planes which allowed an easier overall experience 

WEEK 5: Measurements and preliminary model making.

Measurements & Diagrams  

To accurately construct a model of my living space, careful measurements were taken using measuring tape and translated into a sketch to visualise the space in 2D. Doing so allowed me to gain a deeper understanding of form, open structures and facilitate movement in the area whilst considering the dimensional stability of the model making material (cardboard & cardboard paper). 

Justifications 

  • Cardboard paper and cardboard were used as the medium for this preliminary model due to its forgivingness and ease in manipulation. 
  • Due to the physical limitations of cardboard paper (dimensional stability), by reducing the original scale given (1:20) to 1:40, the model is able to increase its strength and thus maintain its structural form 
  • Shelves were cut out from the original walls to reduce the use of glue and external materials to create existing elements in the room. This was also an experiment to visualise how light would penetrate the model from different openings. 

PAPER CARDBOARD MODEL 

Natural lighting 

  • (+) Have a lot of cardboard paper available   
  • (+) Cuts are cleaner and cutting complex shapes are easily manipulated 
  • (-) Can rip and tear quite easily 
  • (-) Easily creased 

Artificial lighting 


CARDBOARD MODEL 

Natural lighting 

  • (+) Strong and durable 
  • (+) Structurally stable and are easily glued 
  • (-) Does not look as clean as cardboard paper (frayed edges)
  • (-) Hard to work with and cut 

Artificial lighting 

CONCLUSION 

Moving forward I will choose cardboard paper as my medium due to its ability to adapt and ease to work with in comparison to cardboard that is not easily folded. 


WEEK 10: VIDEO PRESENTATION